
Comparing Power BI and Excel: What’s the Best Business Analytics Tool?
As data analysts, we are always trying to make processes less human-dependent. Data workflows ideally will have databases and automatic pipelines that don’t depend on human intervention, however, things don’t work that way all the time. It’s normal to find some data that resides only in someone’s mind, or a local spreadsheet. For these scenarios, it’s inevitable to have a human involved but can we make the process easier and less prone to error?
Related blogs
Load Excel Spreadsheets to Structured Databases with Azure Data Factory: Step-by-step
Why and When to Use Serverless SQL Pool Over Dedicated SQL Pool?
Is There a Way to Use SharePoint as a Data Source in Power BI to Help Me with This?
In the following example, we will use SharePoint as the place to host a list, where we will input some basic example values called “Open Jobs”, a numerical value.
There are several advantages to using SharePoint lists:
📋 The SharePoint list resides in SharePoint online, which makes it accessible from practically everywhere.
🗄️ You can define the column structure; you don’t have to worry about changes on a spreadsheet or csv file structure that could potentially break your pipelines
⚙️ You can manage permissions using AD (Active Directory) groups.
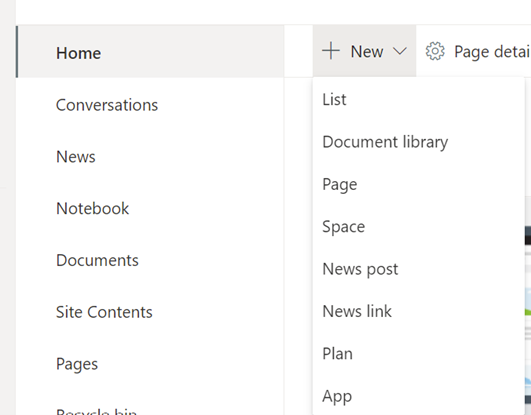
1. The first step is to create a SharePoint list with the desired structure. On the SharePoint Site, click on New- List.
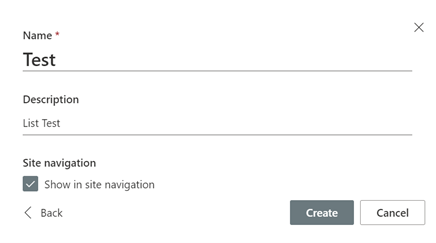
2. Select Create a Blank list.

4. You can create the structure by adding columns in the regular view, or you can edit it in Grid view.
5. When you add a column, you can define the type of field and rules to the input, a default value, if the field is mandatory, the number of characters and other parameters. The rules you apply here will control the data on your list, so it’s important to define them wisely.
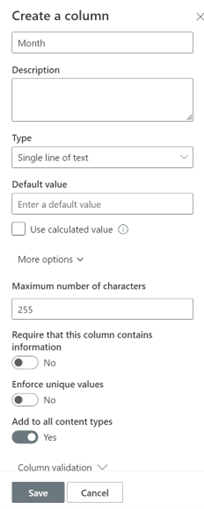
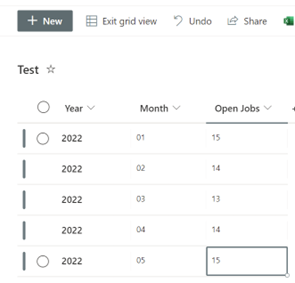
In this example, we created a list with 3 columns: Year, Month, and Open Jobs.

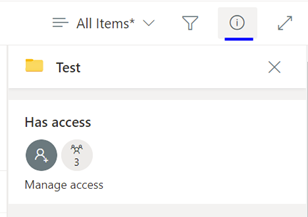
6. Once the SharePoint list is created, you can assign permissions to the users who will update the list. Go to the Information button on the top right and click on Manage Access.
 7. You can assign permissions with a link or direct access. In this case, we will assign direct access to the users updating the list.
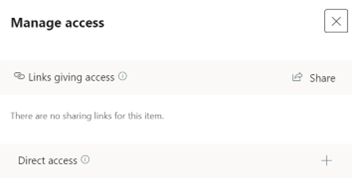 8. You must then click the + sign and select from AD group or a specific person

9. Now that the structure is created and the permissions are assigned, we must fill the list with the values for each month and a process must be defined to outline who can do the updates and when they should be done.
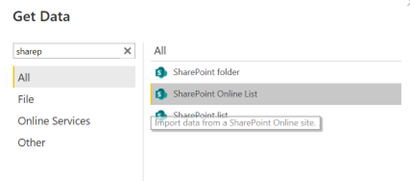
10. The next step is to create a connection from Power BI to the SharePoint list. From the Power BI Desktop, click on Get Data and then SharePoint Online List
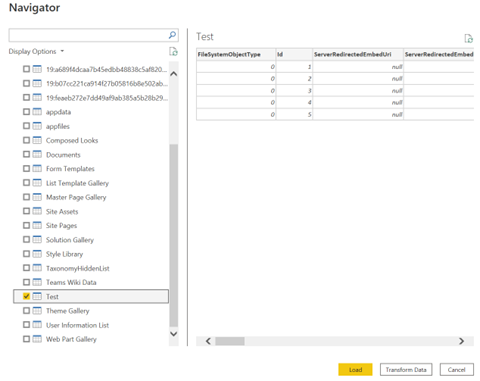
11. Then type the URL from the site where the list was created, select it from the list and finally click on Load (Note: The URL must be from the site, not the URL from the list)
For full details on how to connect Power BI with a SharePoint list, see the instructions in this Microsoft document.
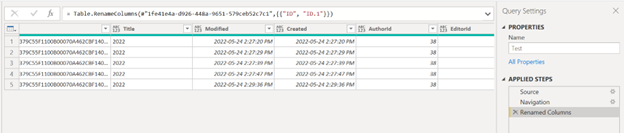
The SharePoint connector will bring additional columns related to the SharePoint list; if you are not going to use them, you can just remove them from the query. Now, you have a new source in the Power BI desktop that you can use to connect with other sources in your reports.
*For a scheduled refresh of the data, it is recommended to have a service principal instead of a standard user account. See more information on how to create a service principal here: Portal, CLI, Powershell.
Thoughts and Next Steps
This was a quick introduction on how to connect Power BI to SharePoint Lists and avoid local files. With some work, this could be expanded using Azure Data Factory to integrate lists with other business information and sync it to an Azure Data Lake or a Data Warehouse, exposing this data not just for a single report but for company-wide use.
To help us tailor future technical blogs, let us know what your particular interests are. As always, if you have any issues, or would like to ask us any questions, feel free to reach us.
.png?width=850&name=Shipping%20%26%20Inventory%20Reporting%20-%20Power%20BI%20Case%20study%20(5).png)

Oscar is a skilled Data Analyst with a strong background in Software Development. With expertise in data-driven decision-making and technical problem-solving, Oscar leverages both analytics and development skills to deliver impactful insights and innovative solutions.


Comments