There are some activities in every business that we execute periodically, normally these tasks are a set of consecutive steps that can be mapped in a business flow even though these flows may potentially have some parameters or differences between each specific request. One example is an onboarding process for a new employee. In the example below, we will create a simple onboarding process and will trigger some actions using Microsoft tools like SharePoint, Outlook, and Approvals.
The first thing we must do is login to Power Automate. Power Automate is a service that allows users to automate tasks, get notifications, approvals, synchronize files and more. We then go to the Power Automate URL following this link.
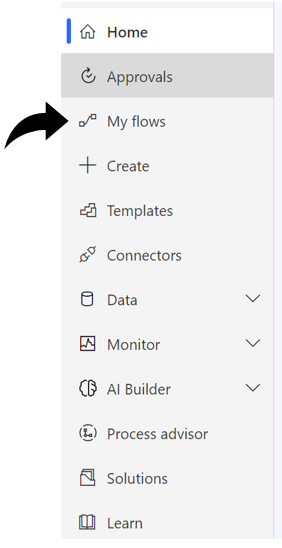
1. Once you login to Power Automate, we can go to the left menu and select "My flows" like in the picture below.
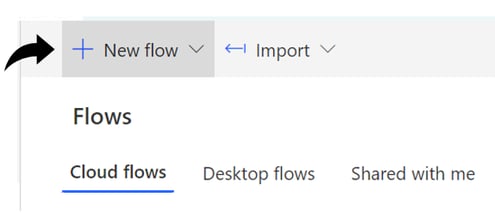 We can start with a template if we need a specific action to be automated, like scheduling a reply, or triggering an email when an action is performed.
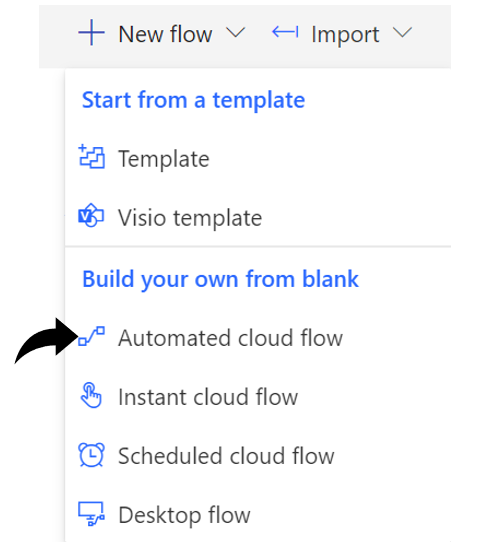
We will create a new flow from scratch, so we will choose “Automated cloud flow”.
We then create a name for the flow, and select the trigger for the flow, an important step as this is the action that will start the flow execution. In this example, we select “When an item is created in SharePoint”.
 Now that we have our first step in the flow, we must create a List in SharePoint since this is where we will create new items that will trigger the Power Automate Flow.
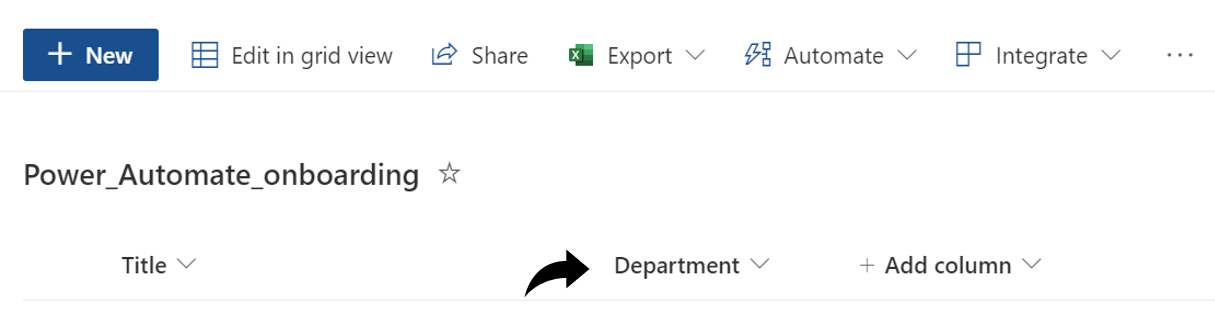
We create a list called "Power Automate Onboarding" on the company site.
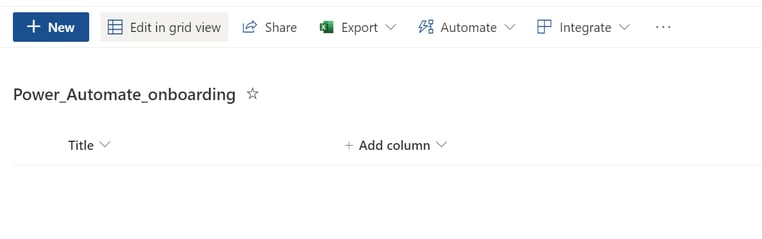 Add a column called “Department”, which will allow us to create different branches and actions depending on the department.
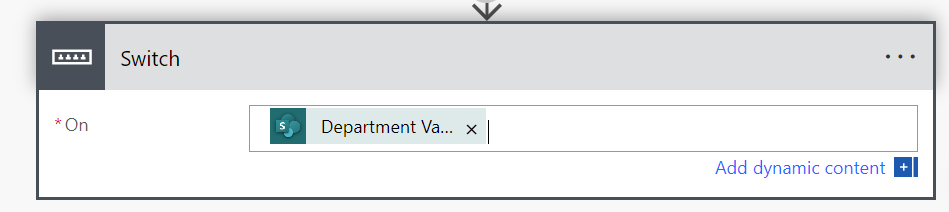
Once the list is created, we go back to Power Automate and type the site URL and the list, like in the example below. 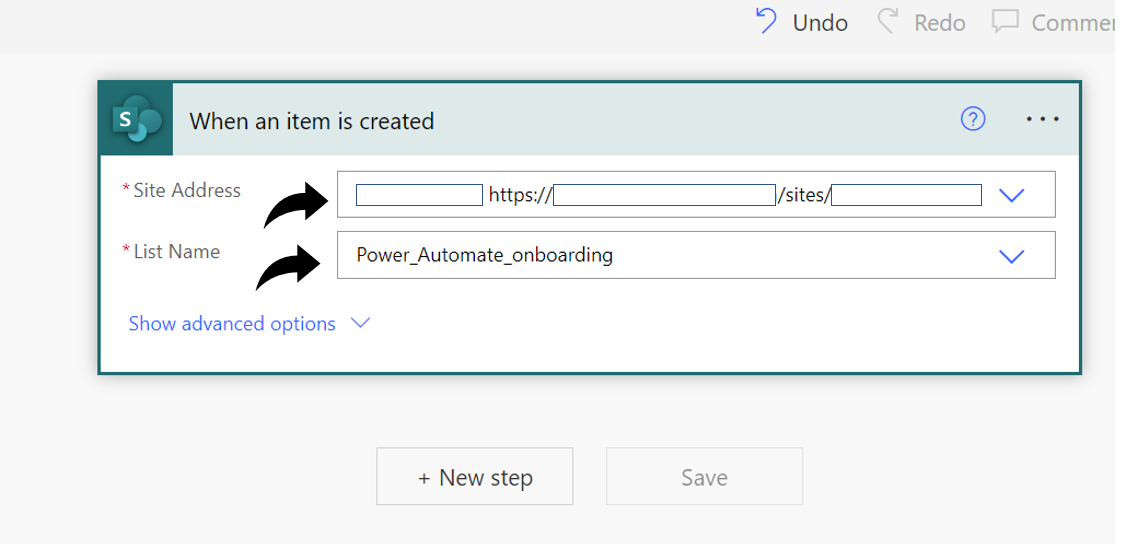 Now that we have the trigger, lets create a new step clicking on the “New Step” button. We will type in the search field the word “Switch” which will allow us to create different branches based on the Department field we created on the SharePoint List. Once the Switch step is created, we will choose Department Value in the “On” field, like the image below.
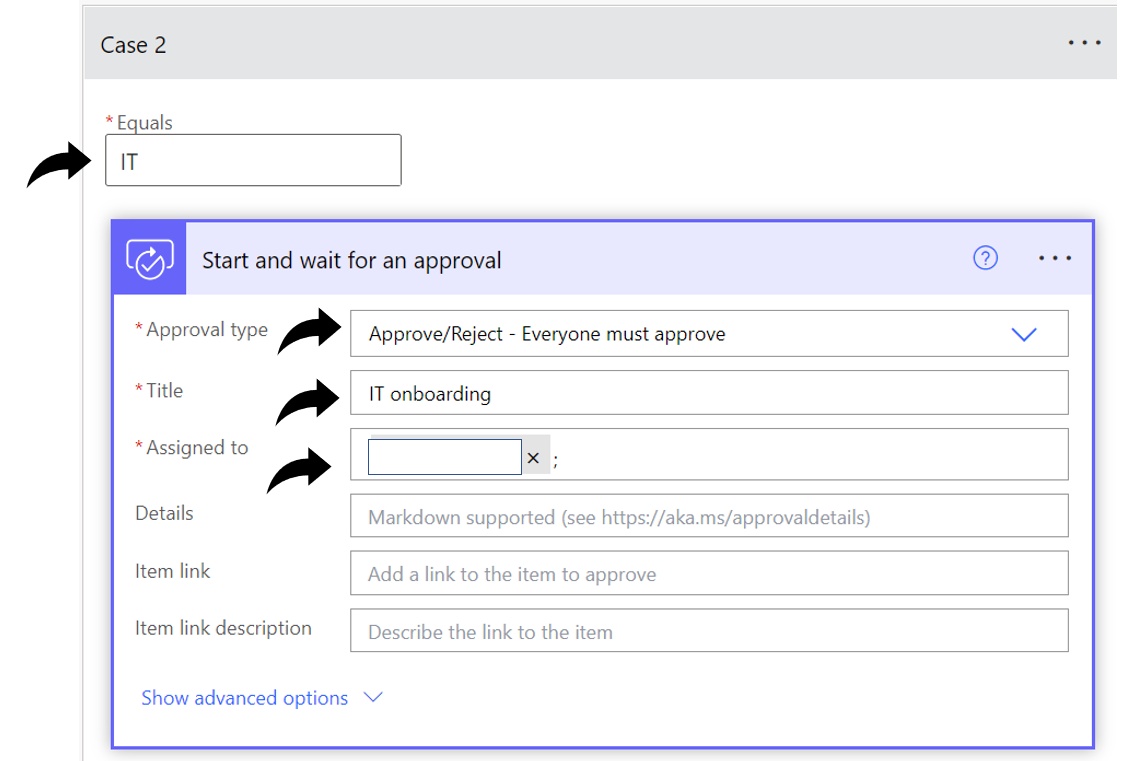
Now that we know which field will be compared, we have to create the different cases for each possible value of the field. In the SharePoint list, we created the department field as a selection field, with defined options: “Marketing”, “IT” and “Admin”, we will now create a case for each of them.
The first branch will be for a Marketing onboarding process so we type “Marketing” in the Equals field and add a new action called “Outlook send an email (V2)”. We choose the receiver, what the subject will be and the body of the email, per the image below.

We will then create a new Case for IT onboarding. Let’s say IT requires an approval before executing the onboarding tasks. We type “IT” in the Equals field and add a new action called “Approvals (Start and wait for an approval)”. We then fill in the mandatory fields, “Approval type”, “Title” and “Assigned to”. In the case where a new employee for IT starts, we will have to wait until the approval is “Approved” before sending the email to execute the onboarding tasks.
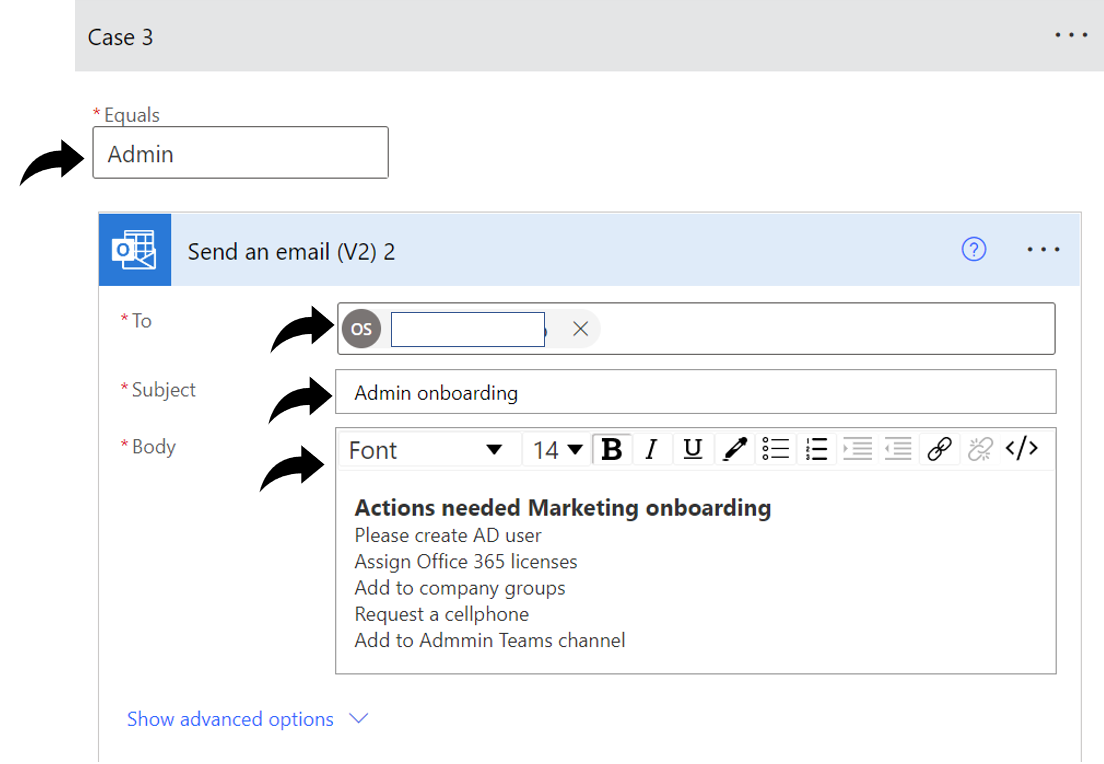
 Finally, we will create a new case or branch for the Admin onboarding. We will add an action to send an email as well, but we will add additional tasks to the body of the email, like in the image below.
Now that we have all the tasks for each department, we then create a final Step to create a Teams meeting to finalize the onboarding. We create a new step and search for “Create a Teams meeting” option. We then fill in all the required fields and save the Flow.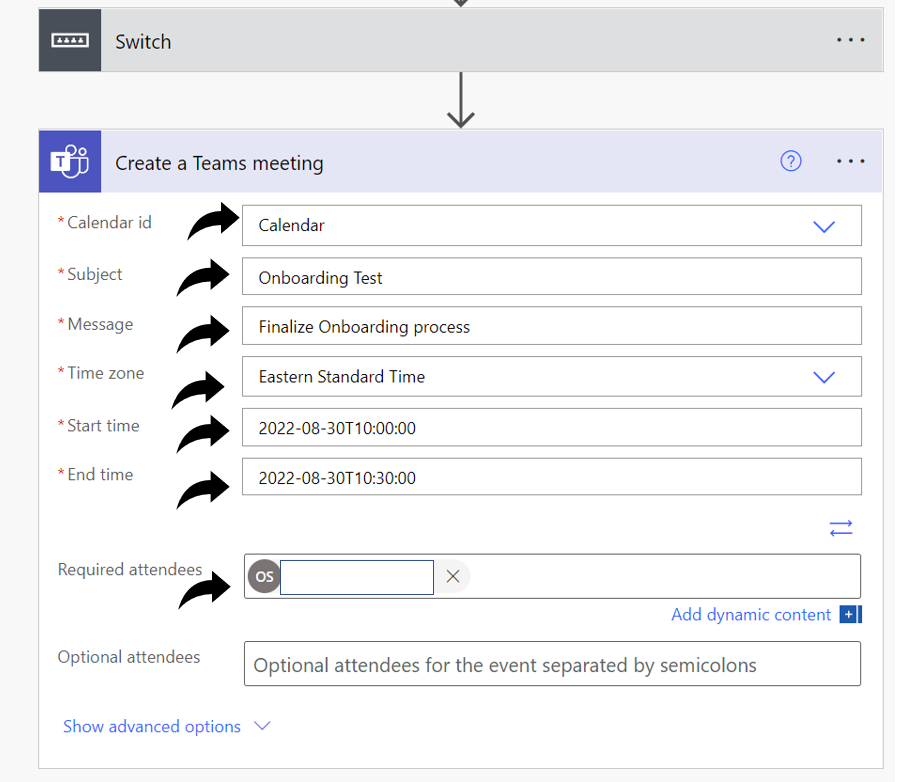
Now we are ready to test the Flow. We switch back to SharePoint and will create a new Item in the list. In this case, we will create a Marketing onboarding, like the image below. 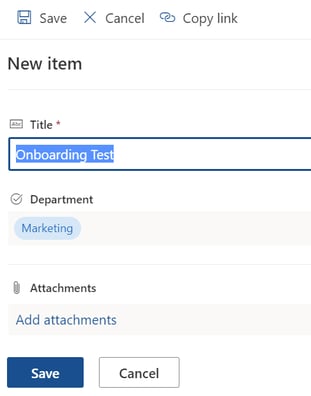 Once we save the new Item on the list, the flow will be triggered. We can go back to the flow main page, and we’ll see how the flow runs.
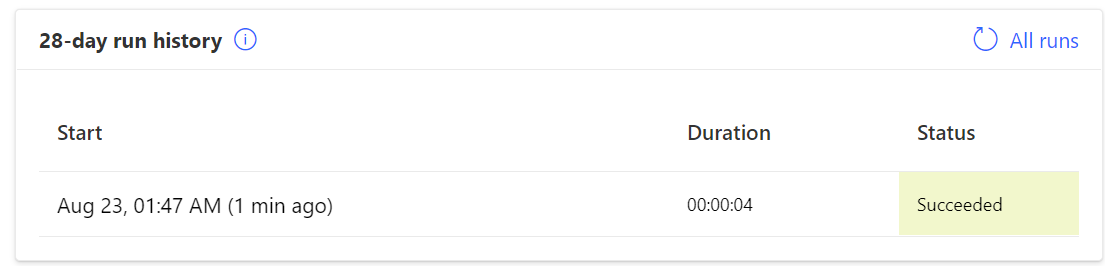
If you click on the flow, you can see each step and validate each of them.
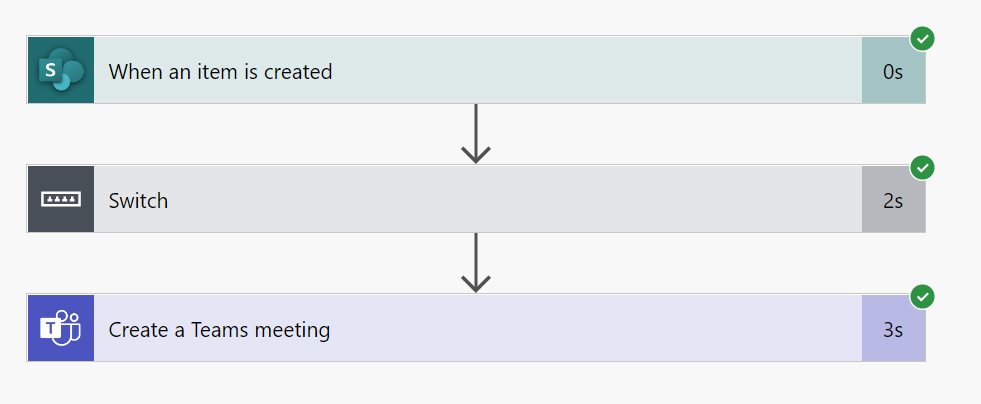
The first step of an item being created in SharePoint (the trigger) ran successfully.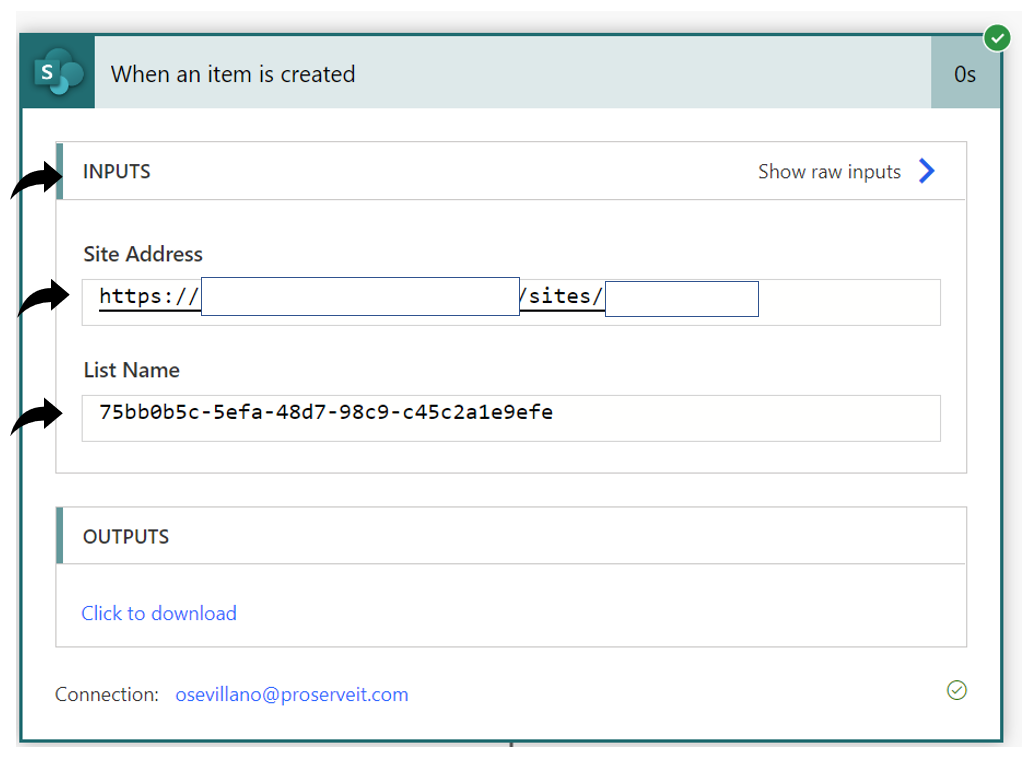
The "Switch" step got the value Marketing, as we can see below.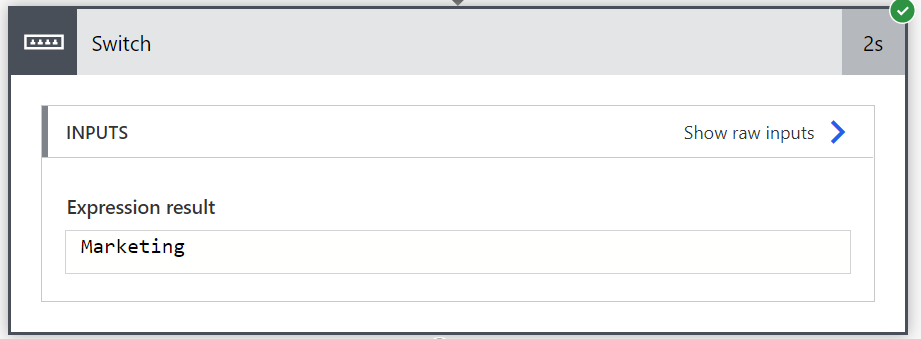
The final step, sending an email also ran successfully as we can see in the details. 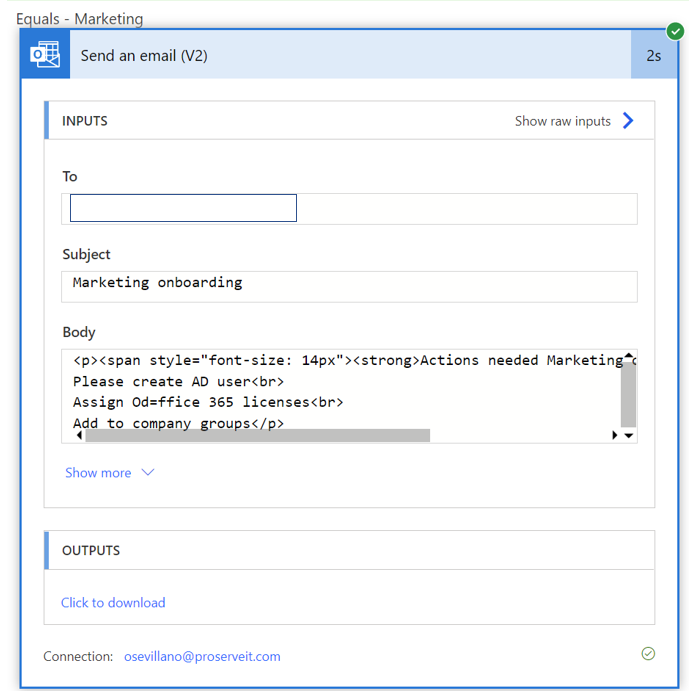 We just created a simple flow that grabs some data from a SharePoint list, and executes some steps based on the list fields. We can add more actions and steps as required as there are lots of integrations available with tools from Microsoft and other vendors. I suggest you try it and start automating your business processes.
For further information on how we can help your organization to turn your data into a growth strategy, visit our Insights & Automation page. To get started, book a call to discuss your organization’s unique requirements. 

Comments